
Tips for taking photos
and enjoying your forests during Florida summers
(How you can enjoy the muggy, buggy outdoors with your camera this summer)
Many people avoid the outdoors once the warm months hit, but there is much to see and do during the warmer months; wildflowers are in bloom, pollinators are plentiful, birds are nesting and wildlife is out and about, enjoying nibbling the new plant growth.
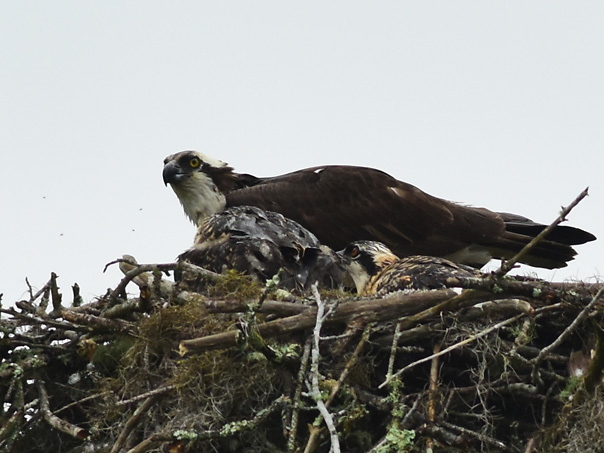
Osprey with chicks in nest
Also, mosquitoes, chiggers, ticks and variety of biting flies are eagerly waiting for us to venture out. Combine this with saturated air and high temperatures and you can see why most folks shy away from being in the woods in summer.
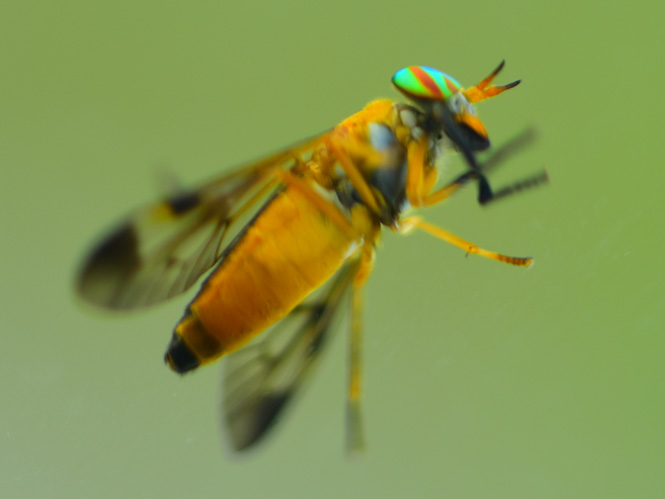
Yellow fly
While covering up from head to toe and taking a bath in a mix of insect repellent and sunscreen works for some people, others prefer to do a little planning and preparation prior to venturing out into the wild.
Trails are more pleasant in the early morning hours: the temperatures are cooler, wildlife is more active and the early morning light is great for photography.
Lightweight breathable pants and long sleeve clothing will help you stay cool and there are insect repellents that can be applied to clothes that last for several weeks, leaving only minimal areas of skin to which insect repellant can be applied.
Light colored clothing reflects sunlight and it’s easier for spotting unwelcomed hitchhikers such as ticks. A hat works great for keeping the sun and bugs off the top of your head. A mosquito head net is a nice, sustainable alternative to bug spray on your face.
Staying hydrated while outdoors is very important- a vacuum insulated bottle keeps your drink cold for an extended period, reduces waste, keeps you from ingesting micro plastics, and when you’re really feeling the heat, a cold drink can make all the difference.
Carrying a snack is also a great idea, please avoid items with disposable wrappers, it’s very easy for them to accidently end up in the environment where they will linger for years. Do the planet a favor and use reusable containers for your snacks instead.
Photography / camera gear / protecting your investment
Moisture and electronics do not play nicely together. If you’re planning on hiking a trail, it’s wise to carry some form of rain protection for your gear; a cheap packable poncho works well. Assume you will get rained on while outdoors, and always be prepared. If your camera gets drenched, immediately remove the battery and memory card, and as soon as possible put everything in a sealed container of rice for a few days. Do not power up a wet camera, it is the fastest way destroy it. Rice is a surprisingly effective desiccant and will dry your gear off very effectively.
If you are after great cloud shots, afternoons are your best bet, and Florida in the summer tends to be pretty reliable for providing dramatic skies from noon on into the evening and night.
If you’re planning on taking a scenic driving tour through picturesque locations, there’s a really good chance your lens will fog up within a few seconds of stepping out of the cool comfort of your air-conditioned vehicle to get that killer shot of a field of pitcher plants. The key to avoiding this is keeping the camera warm, or at least getting the front of the lens warm. A cold camera will form condensation, much the same way a cold glass of water or can of soda will in warm humid air. I find that placing the camera on a sunny dashboard or briefly blasting the front lens element with heat from the vents will keep the lens from fogging up.
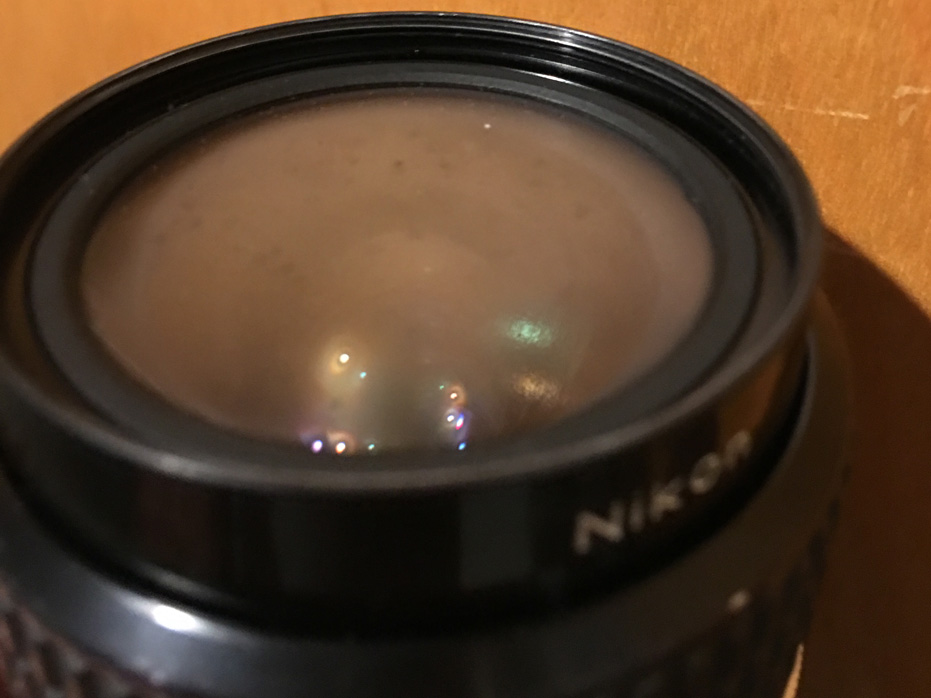
Condensation on lens
If you are going to change lenses, do it before exiting the vehicle while you’re in dry, air conditioned air. Switching lenses outside risks getting dust in the camera, plus humid air will likely begin to condense on the rear lens element, mirror and other camera internals.
When you get back indoors, it’s good to leave your camera gear out for a good while to make sure any humidity, condensation or rain water has the opportunity to dry. Wet lens glass will eventually develop fungus, which unfortunately etches into the glass. Needless to say, repairing this type of damage can be very expensive if not impossible, so an ounce of prevention goes a long way.
Making those photos POP!
There are several websites that offer advice on setting for getting the best looking shots out of your DSLR. It’s good, at least as a starting point, to use settings that others have already spent the time and effort to develop.
While you can spend a fortune on lenses and other close up gear, great results can be obtained by using extension tubes on normal lenses. An extension tube allows you to get very close to your subject, frequently just few inches away. A flash attached to you camera via a cable and held near the subject will allow you to light the subject the way you want.
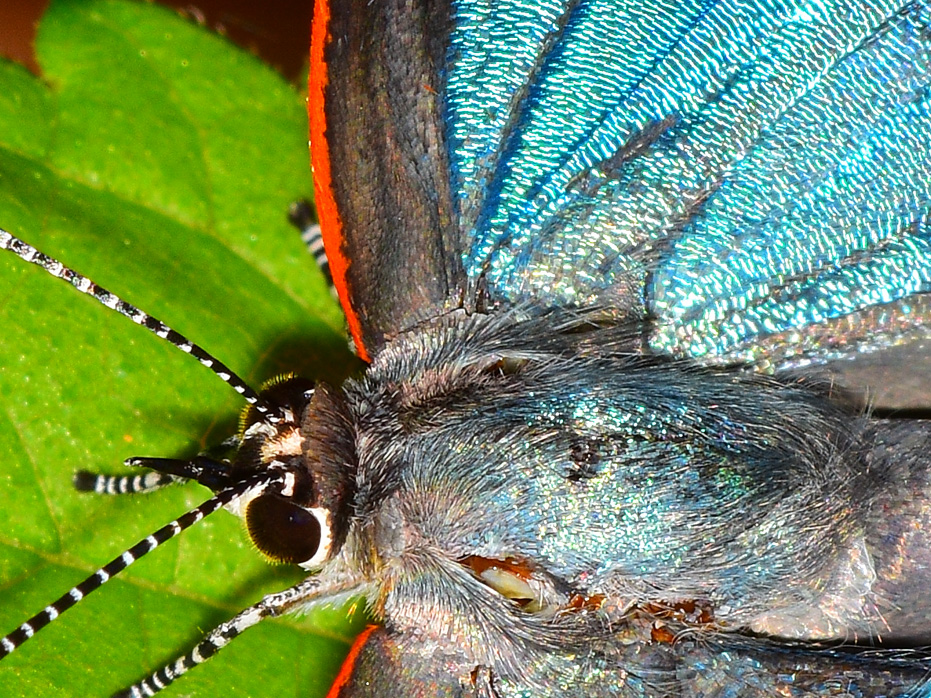
White M Hairstreak. Note the interesting light refraction on the compound eyes
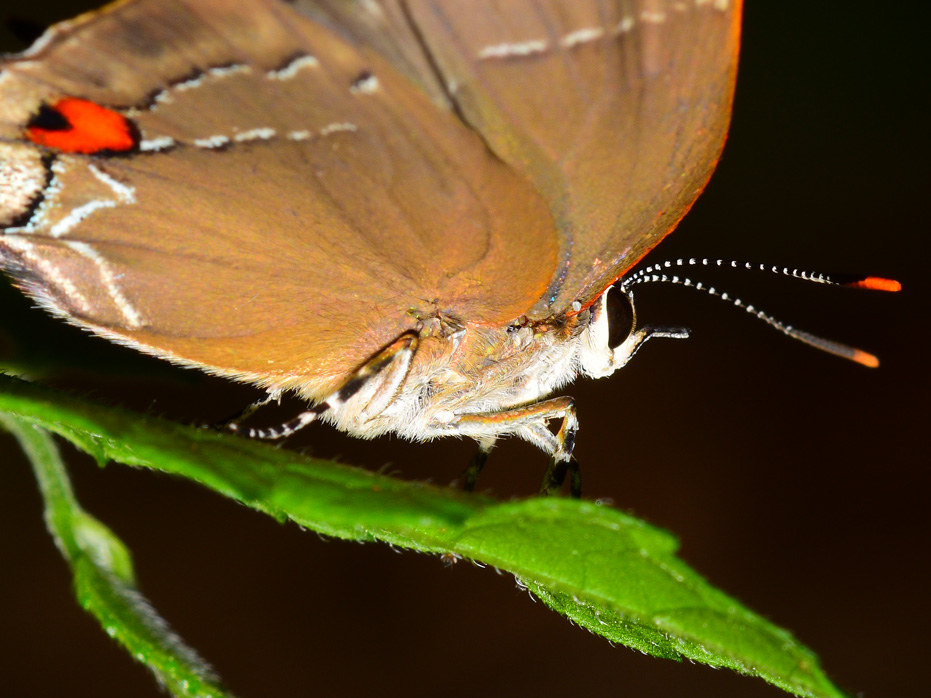
White M Hairstreak, with antennae and hairy body detail visible
For mobile device users, there are apps that allow increased control of the camera, so some searching online will reveal the best apps is for your device. Add-on lenses are also available for macro as well as wide angle photography.
One of my favorite tools to use for outdoor photography is a polarizing filter. Polarizing filters are great for making a dull sky bluer, greens more vivid, can help bring out hues and detail in clouds, and can cut through glare and reflections on water so that you can see what’s below.
Without polarizing filter
With polarizing filter
Don’t be afraid to put the sun behind your subject; back lit leaves show off the intricate leaf vein structure within, colors become vibrant and dew or raindrops will sparkle and refract light.

Dewdrops refracting morning light on spider web